
Few things are more frustrating than a puncture mid-ride. One minute you're rolling nicely, the next you're at the side of the road watching everyone else disappear. It happens to every cyclist sooner or later, and how quickly you deal with it comes down to two things: knowing what to do, and having kit that actually works.
This guide covers both. It walks you through fixing a puncture step by step, and it explains why the tyre levers in your kit bag are more important than most people realise.
What to carry before you leave the house
A good repair kit does not need to be heavy or complicated. At a minimum you need:
-
A spare inner tube (two on longer rides)
-
Tyre levers
-
A mini pump or CO2 inflator
-
A puncture patch kit as a backup
All of this fits under your saddle. The Stique SaddleGuard is designed to hold your repair kit securely without the rattling and bouncing you get from cheaper bags. It sits cleanly under the saddle and stays put on rougher roads, which matters more than it sounds on a long ride.

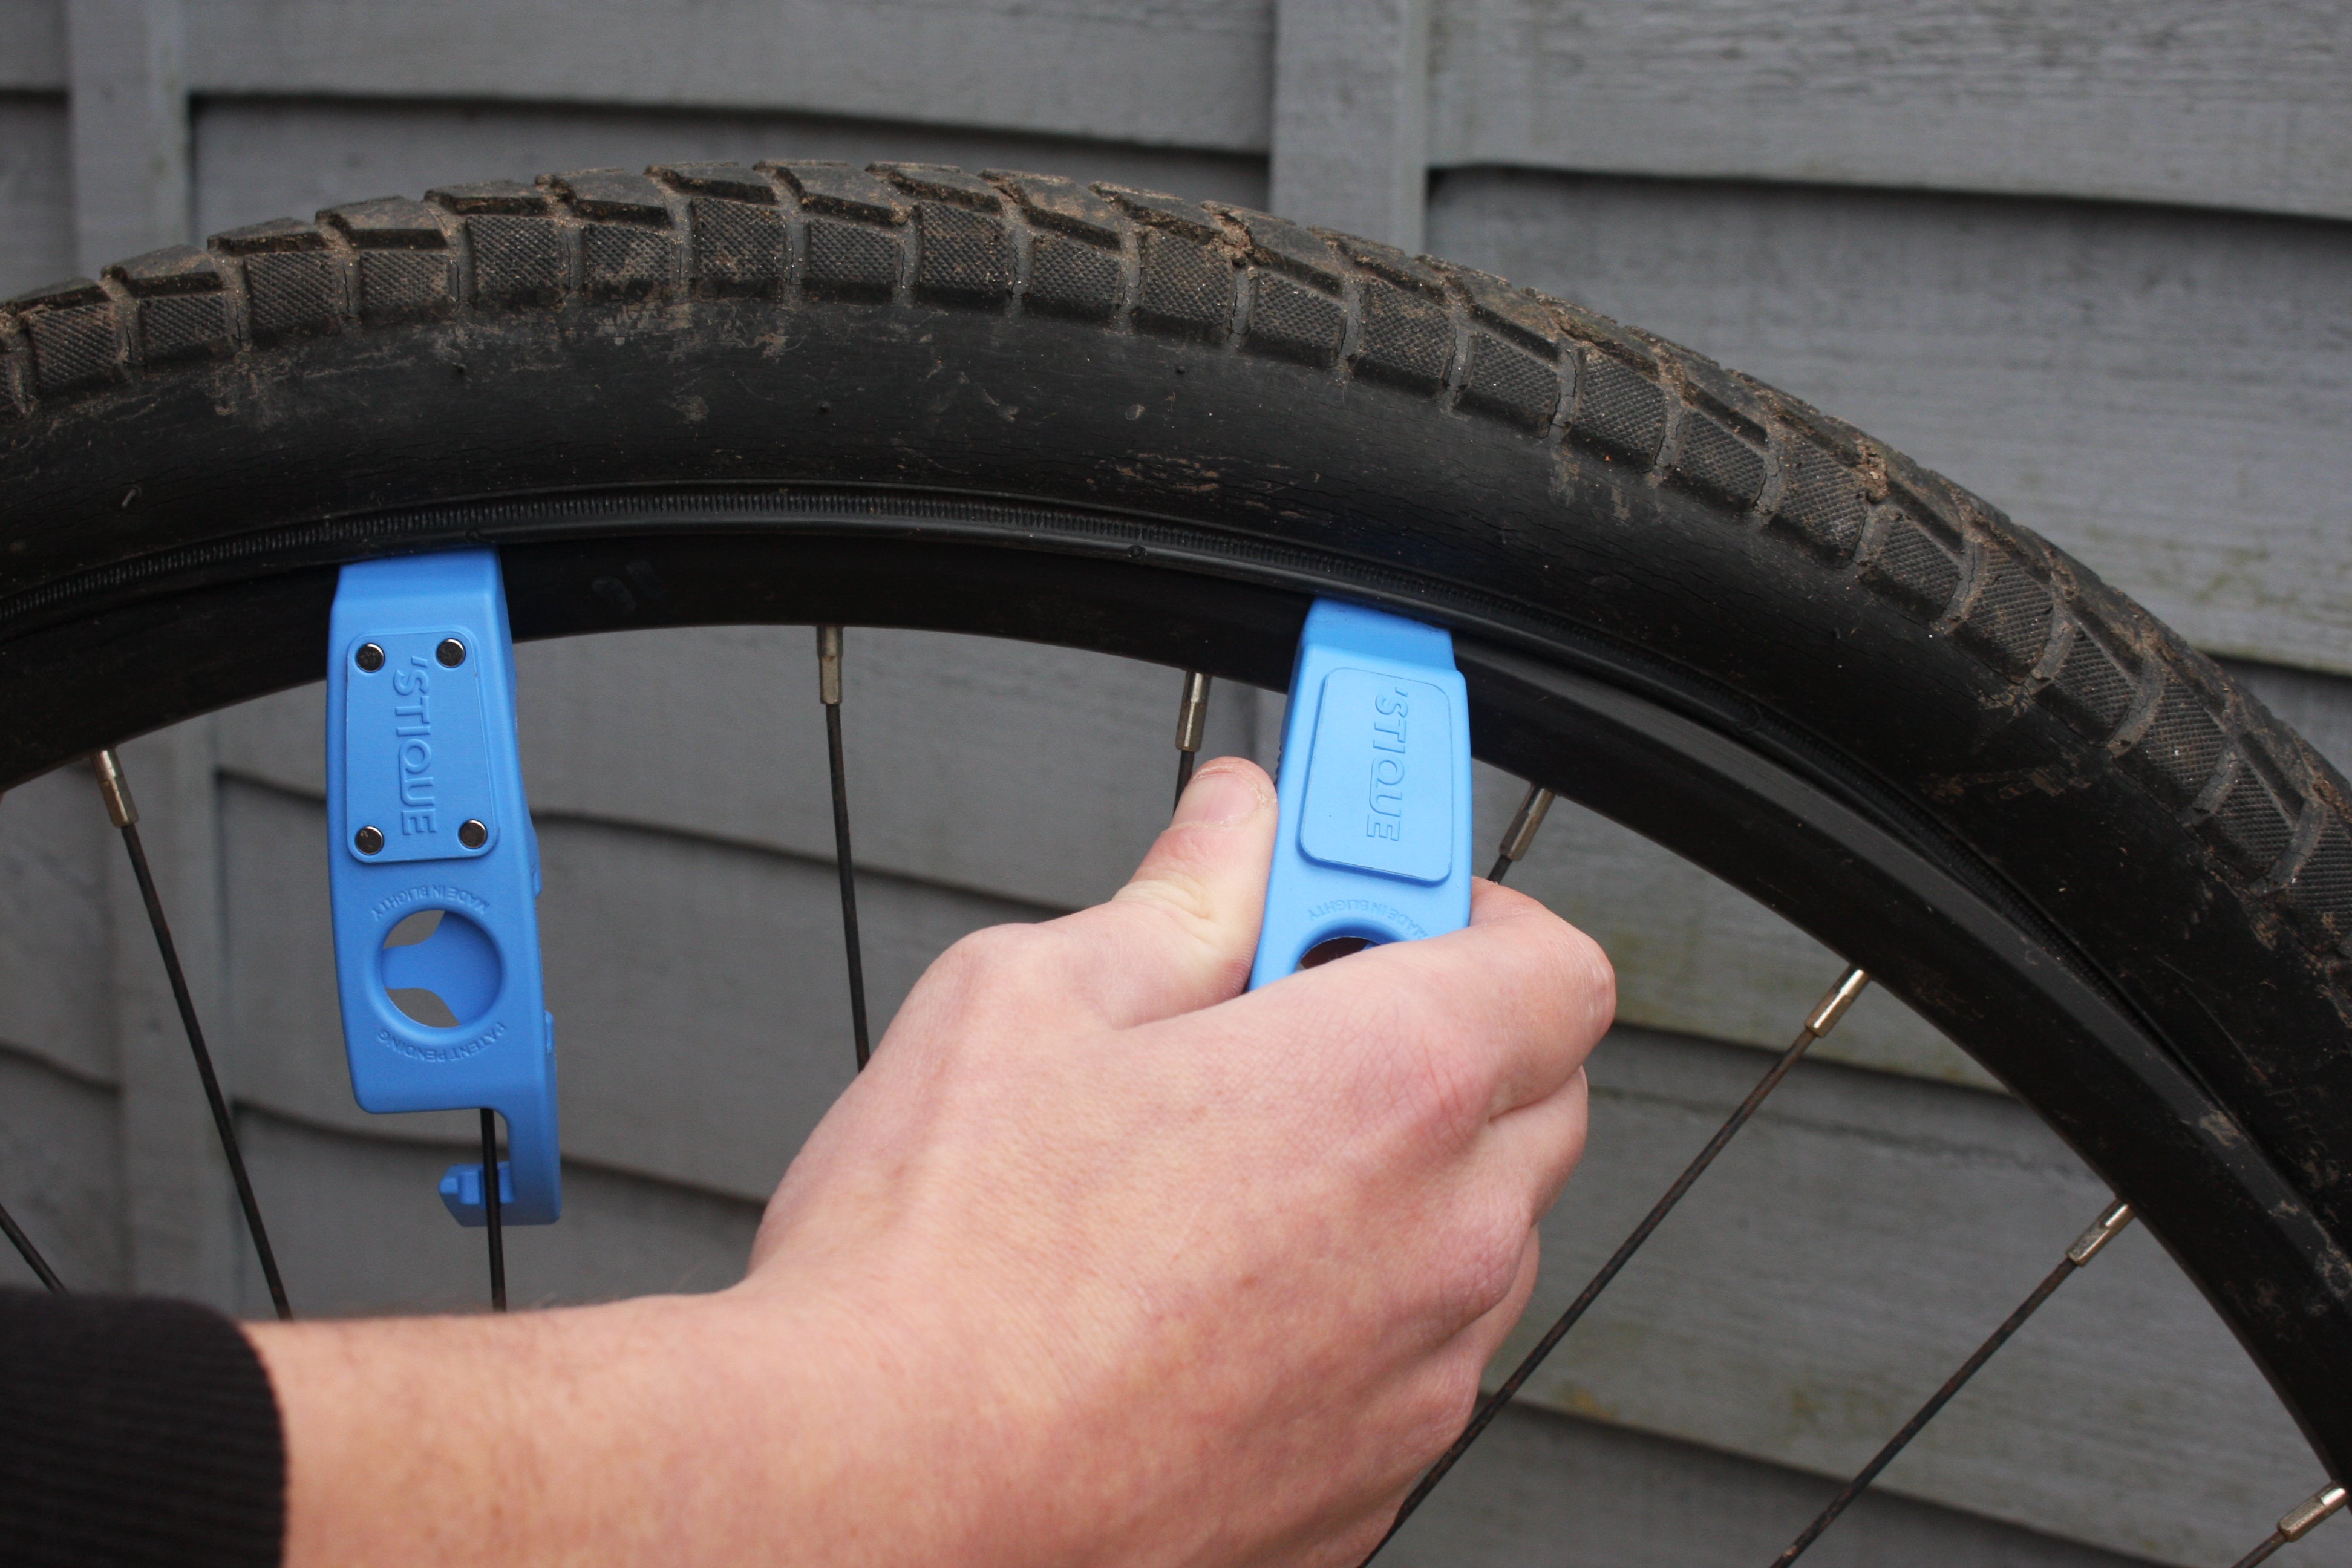
Why your tyre levers matter more than you think
Most cyclists do not think about their tyre levers at all. They come bundled in cheap repair kits, get thrown in a bag and forgotten about until they are needed. That is fine until one snaps in half halfway through removing a tight tyre, leaving you with nothing to work with.
Cheap plastic levers are not designed for the narrow, tight-fitting tyres that most road and gravel cyclists run. Under serious leverage, they give way. And a broken tyre lever with no spare means a long walk.
Stique tyre levers are made from glass-filled nylon, the same material used in engineering components. They have the strength to deal with tight tyres without flexing or snapping, and they are shaped to hook securely onto a spoke so you can hold the tyre bead over the rim without losing the lever.
It sounds like a small detail. It is not, when you are standing at the side of the A road at 7am.
How to fix a bike puncture, step by step
Step 1: Get safe and find the puncture
Pull over somewhere safe, away from traffic. Inflate the tyre slightly if it has gone completely flat. You will often hear the air escaping, which makes locating the puncture much faster. Run your hand slowly around the tyre and feel for anything embedded in the rubber. If you find something, remove it carefully, but remember where it is so you can find the corresponding hole in the tube.
Step 2: Remove the wheel
Release the brakes and open the quick release, or undo the thru-axle. If it is the rear wheel, shift into the smallest sprocket before removing it. This makes getting the wheel back on considerably easier. Lay the bike down carefully, making sure you do not rest it on the derailleur.
Step 3: Remove the tyre
Let any remaining air out by pressing the valve. Starting opposite the valve, hook your first tyre lever under the bead of the tyre and pull it over the rim edge. Hook the lever onto a spoke to hold it in place. Insert a second lever a few centimetres along and repeat. With most tyres you can then run the second lever around the rim to release the whole bead. Slide the tube out and remove it from the tyre.
With tight tyres, work in small sections rather than trying to lever a large section at once. Rushing this step is how levers snap and rims get damaged.
Step 4: Find the hole
Inflate the tube slightly and hold it close to your face. You will feel the air escaping. If you cannot find it by feel, listen for the hiss. Once you have found the hole, mark it with your fingernail or a small pen mark. Check the inside of the tyre at the same point for any remaining debris that caused the puncture in the first place.
Step 5: Replace or patch the tube
On a ride, replacing the tube is faster and more reliable than patching it roadside. Keep the punctured tube to patch properly at home as a spare. If you do not have a spare tube, use your patch kit: roughen the area around the hole with sandpaper, apply vulcanising glue, wait until it goes tacky, press the patch on firmly and hold it for a minute.
Step 6: Refit the tube and tyre
Put a small amount of air into the new tube so it holds its shape. This stops it getting pinched between the tyre and the rim. Feed the valve through the valve hole, then work the tube into the tyre. Starting at the valve, push the tyre bead back onto the rim with your thumbs. Work around both sides evenly. The last section is always the tightest. Use the palms of your hands rather than your fingers for the final push, and avoid using levers to refit the tyre as they can pinch and puncture the new tube.
Step 7: Inflate and reinstall
Inflate the tyre to the correct pressure. Check the sidewall for the recommended range if you are not sure. Give the tyre a quick look to make sure the bead is sitting evenly all the way around the rim. Reattach the wheel, make sure the quick release or thru-axle is properly secured, realign your brakes, and you are good to go.
The kit that makes it quicker
The difference between a smooth five-minute roadside repair and a twenty-minute ordeal usually comes down to the quality of what you are carrying. A tube that fits, levers that do not snap, and a pump that inflates properly.
The Stique ML14 combines a tyre lever with the most commonly needed multitool functions, including the hex keys you need for most mid-ride adjustments. It is compact enough to sit in a jersey pocket and handles both the repair and the adjustments that come after it, without needing separate bits of kit rattling around in your bag.
For longer rides or touring, the Stique ML125 adds a chain tool and Torx bits to the mix. More tools in the same compact format, for the kind of rides where a wider range of mechanicals is more likely.

Never get caught out
The best puncture repair is the one you are properly prepared for. Carry a spare tube, carry levers that will not let you down, and keep your kit somewhere you will actually have it when you need it.
Stique tools are designed and made in Britain for cycling in the real world. Take a look at the full range.